
Introduction
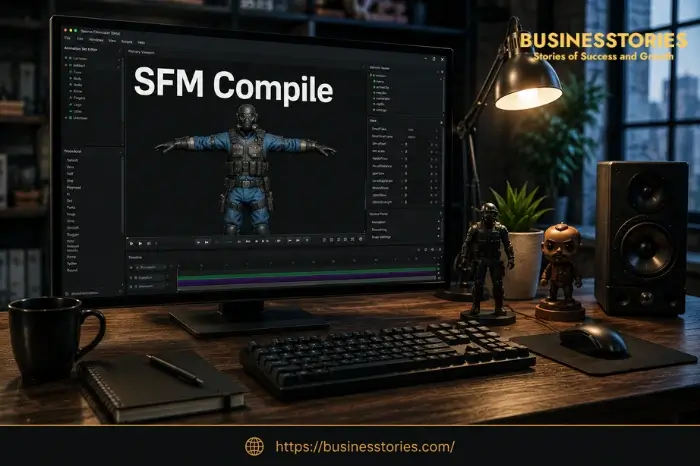
Have you ever built a fantastic 3D model? But you could not see it in Source Filmmaker? That happens to almost every new creator. And the reason is almost always the same. You skipped the SFM Compile step.
SFM Compile turns your raw 3D files into a format the Source Engine can read. Without it, your model will not show up. Think of it like baking a cake. Mix all the parts, but do not put it in the oven until. It is not a cake yet. Compiling is that last key step.
So, what will this guide cover? First, you will learn what SFM Compile is and why it matters. Then, you will discover the tools you need. Thereafter, you will follow clear steps to compile your first model. Finally, you will learn how to fix common errors and use advanced tricks. Let us dive in.
What Is SFM Compiled, and Why Does It Matter?
Before you start, you need to understand what SFM Compile actually does. This knowledge will save you a lot of time later.
Source Filmmaker runs on Valve’s Source Engine. This is the same engine behind Team Fortress 2, Half-Life 2, and Portal. However, this engine does not read standard 3D formats like OBJ or FBX. It requires its own unique file types instead. So, when you build a model in Blender, the engine simply cannot open it yet.
That is where SFM Compile comes in. It reads your raw files and converts them into engine-ready formats. Specifically, it turns .SMD or .DMX files into these four key outputs:
- .MDL — The main model file with geometry, bones, and metadata
- .VVD — Vertex data for the rendering pipeline
- .VTX — Optimized mesh data for your graphics hardware
- .PHY — Physics collision data for interactive models
Without these files, your model will not load. You will see either a missing texture error or a blank space where your model should be.
However, many guides overlook an important aspect: compiling also verifies the accuracy of your work. During the process, it scans for broken bones, incorrect texture paths, and broken animation data. So, besides converting your files, it also acts as a built-in quality check. Plus, compiled models run faster and render more smoothly. So, SFM Compile is not just required. It also makes your work better.
Essential Tools for the SFM Compile Workflow
Good news, you do not need to spend any money. All the core tools for Source Filmmaker model compilation are completely free. Here is what you need and why each tool matters.
Blender with the Source Tools Add-on
Blender is the best starting point for most creators. It handles modeling, rigging, and UV unwrapping well. More importantly, the Blender Source Tools add-on exports models as .SMD or .DMX files. Those are exactly what the compiler needs. You could also use 3D Max or Maya. But those cost over $1,700 per year. So, Blender wins for most people.
Crowbar — The Compilation Tool
Crowbar is the most popular compilation tool in the SFM community. It gives you a simple, visual interface over Valve’s command-line compiler, studiomdl.exe. Think of it this way: studiomdl does the actual work, and Crowbar makes it easy to use. With Crowbar, you just pick your QC file, set a folder for output, and click Compile. It also shows you a live log so you can spot errors quickly. Most beginners prefer Crowbar over the command line, and for good reason.
Notepad++ for QC File Editing
Your QC file is a simple text file. However, it needs to be very accurate. Notepad++ is the top choice for QC editing. It shows line numbers and highlights syntax. These two features help you spot mistakes fast. Any text editor works, but Notepad++ makes it easier.
VTFEdit for Texture Conversion
SFM needs textures in VTF (Valve Texture Format). VTFEdit lets you convert standard PNG or TGA images into .VTF files. You also need a matching .VMT file for each texture. The .VMT file tells the engine how to show the material. For example, it controls whether the surface is shiny, transparent, or matte.
How to Write a QC Script for SFM Compilation
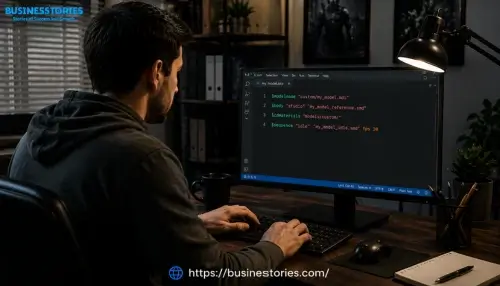
The QC script is the most important part of the whole SFM compile process. It tells the compiler exactly how to build your model. Fortunately, you do not need coding skills to write one. You just need to know a few basic commands.
Understanding Core QC Commands
Here is a simple QC file for a basic model:
- $modelname “custom/my_model.mdl”
- $body “studio” “my_model_reference.smd”
- $cdmaterials “models/custom/”
- $sequence “idle” “my_model_idle.smd” fps 30
Each line has a specific job. Here is what they do:
- $modelname: Sets the name and location of your output .MDL file.
- $body: Points to the main mesh .SMD file from Blender.
- $cdmaterials: Tells the compiler where to find your .VMT texture files.
- $sequence: Adds an animation with a name, an .SMD file, and a frame rate.
That is all you need for a simple model. Of course, more complex models need more lines. But these four commands are the foundation.
Tips for Writing Accurate QC Scripts
File paths cause most compilation failures. Every path in your QC file must be exact. Even one wrong letter or a missing slash will break the build. Therefore, double-check every path before you compile.
For physics models, add a $collisionmodel line. This tells the compiler to include a simplified collision mesh. Keep that mesh simple and closed, or physics will not work right in SFM.
Here is a tip that most guides leave out: add comments to your QC file from day one. Use // to write short notes above each section. When you return to the project later, those notes will remind you of the purpose of each section. This one habit saves hours of confusion on bigger projects.
Step-by-Step: Running SFM Compile with Crowbar
Now, let us go through the full process. Now that you have your model and your QC file ready, follow these six steps.
Step 1 — Set up Crowbar: Download and open Crowbar. Go to the Set Up Games tab. Choose Source Filmmaker from the list. Crowbar will then locate studiomdl.exe in your SFM bin folder on its own.
Step 2 — Organize your files: Before you compile, sort your files into clear folders. Put your .SMD files, QC files, textures, and material files are each in their own named folder. Furthermore, avoid spaces and special characters in folder and file names. These small things cause big errors.
Step 3 — Load your QC file: Click the Compile tab in Crowbar. Then use Browse to find your .QC file. Next, set your output folder. That is where the compiler will save your finished .MDL, .VVD, .VTX, and .PHY files.
Step 4—Run the compile and read the log: Click Compile. Crowbar shows you the log in real time. Read it carefully. Errors show up in red. Each error tells you the exact problem and the line in your QC file where it happened. Fix all errors before you move on.
Step 5 — Place your files in SFM: After a successful compile, copy your .MDL file and its related files into the usermod/models/ folder. Then move your .VTF and .VMT texture files into usermod/materials/. Correct folder placement is essential. If files are in the wrong place, SFM will not locate them.
Step 6 — Test your model in SFM: Open Source Filmmaker. Go to the Animation Set Editor. Then choose Create Animation Set for New Model. Load your model and check everything. Look at the textures, test any animations, and check the scale. Address any problems you notice right away, while the compile settings are still fresh.
Fixing Common SFM Compile Errors
Even experienced creators make errors. The good news is that most errors have simple fixes. Here are the four most common problems and how to solve them.
Purple Checkerboard Textures
This is the most common error for beginners. Those purple and black squares mean the engine cannot find your textures. To fix this, open your QC file and check the $cdmaterials path. It must match the exact folder where your .VMT files live. Also, ensure that your textures are in the right place inside the materials directory.
Broken or Distorted Animations
If your model loads but moves incorrectly, you likely have a bone mismatch. This happens when the bone names in your mesh do not match the names in your animation files. Go back to Blender and check that all bone names are the same across your reference mesh and every animation .SMD file. Furthermore, always apply your scale transforms in Blender before you export. Unapplied scale is a very common cause of broken animations.
Syntax Errors in the QC File
A syntax error in the log almost always means a typo in your QC file. Open the file in Notepad++ and go to the line number the log mentions. Then look for a missing quote mark, a wrong bracket, or a misspelled command. Even one missing character stops the whole compile.
Missing Collision Model
If your model needs physics but you did not add $collisionmodel to your QC file, it may act strangely in SFM. To fix this, create a simple version of your mesh in Blender. Export it separately as an .SMD file. Then add $collisionmodel to your QC file and point it to the new file. Keep the collision mesh simple and fully closed. Complex shapes cause physics bugs.
Advanced SFM Compile Techniques for Better Models
Once you feel confident with the basics, try these advanced techniques. They can make your models look and perform much better.
Level of Detail (LOD) Systems
LOD lets you create several versions of your model at different polygon counts. The engine then picks the right version based on how far the camera is. So, when a character is far away, SFM loads a simpler version. This speeds up rendering without hurting visual quality up close. You set up LODs in your QC file using $lod commands.
Facial Flexes for Expressions
Facial flexes let your character show emotions and lip-sync dialogue. You add them using $flexcontroller and $flex in your QC file. These commands reference blend-shape data from a .DMX flex file. After compiling, you can then control these flexes in SFM’s animation editor. This technique takes practice, but it greatly improves character animations.
Batch Compiling Multiple Models
When you work on a big project, you may need to compile many models at once. Crowbar handles this task natively through its batch compile feature. Simply add all your QC files to the queue and let Crowbar run. This saves a lot of time and reduces the chance of missing a file.
Jigglebones for Natural Motion
Jigglebones add automatic movement to things like hair, tails, or loose clothing. You add them with $jigglebone in your QC file. When your character moves, these parts bounce and sway on their own. As a result, you get natural-looking motion without adding extra animation keyframes. This is a small change that makes a big visual difference.
Conclusion
SFM Compile is the bridge between your 3D model and a working asset in Source Filmmaker. Without it, your work stays locked outside the engine. But with it, you gain full control over custom characters, props, and animations.
In this guide, you learned what SFM Compile is and why it matters. You also discovered the free tools you need: Blender, Crowbar, Notepad++, and VTFEdit. Then you walked through how to write a QC script, run a compile, and place your files correctly. On top of that, you now know how to fix the most common errors and use advanced features like LODs, facial flexes, and jigglebones.
The most important thing to remember is this: stay organized. Keep your files tidy, check your paths, and always read the compile log. Most errors are small and easy to fix once you know where to look.
So, do not wait. Open Blender today, build your first model, and run your first SFM Compile. Your first attempt may not be perfect, and that is completely fine. Every error teaches you something. The SFM community is friendly and full of helpful creators. Join a forum, ask questions, and share your progress. Your best custom model is just one compile away.
Frequently Asked Questions About SFM Compile
Q1: What files does SFM Compile produce from a QC script?
Compiling generates .MDL, .VVD, .VTX, and .PHY files. Together, they give SFM everything it needs: geometry, vertex data, mesh rendering, and physics collision, for your custom model.
Q2: Can I compile SFM models without using Crowbar?
Yes, you can run studiomdl.exe directly from the command line. However, Crowbar shows you a visual log and simplifies the process, so most creators prefer it, especially when starting.
Q3: Why does my model show purple textures after SFM compile?
Purple textures mean SFM cannot find your .VTF or .VMT files. Check that the $cdmaterials path in your QC script matches the exact texture folder inside usermod/materials/.
Q4: Do I need coding skills to write a QC file for SFM?
No, you do not need any coding experience. Basic QC scripting uses simple text commands. Even beginners can write a working QC file after reading a short guide like this one.
Q5: What is the best free tool for SFM model compilation in 2026?
Crowbar is the top free choice for the SFM compile workflow. Use it with Blender and the Source Tools add-on to build a full, cost-free pipeline for custom Source Engine models.

Seasoned Project Manager with 20+ years of experience in the IT industry, driving successful project delivery, team leadership, and strategic execution.